Due to there are a huge amount of process of this project I have already mentioned in my PDF, If I just copy these paragraph into this blog will waste space and time, so I not going to talk about the content I have already explained in my PDF of Element One. This blog will be only used to explain what I did not include in my PDF.
So if you want to see the main process of my Final Major Project, please download my PDF here.
And also if you want to see more about the summer project, pleased download the PDF of my summer project here.
Early Design Before This Project
I have not mentioned this point in my PDF, and by the reminder my friend I thought I should show the early design and do a simple introduction.
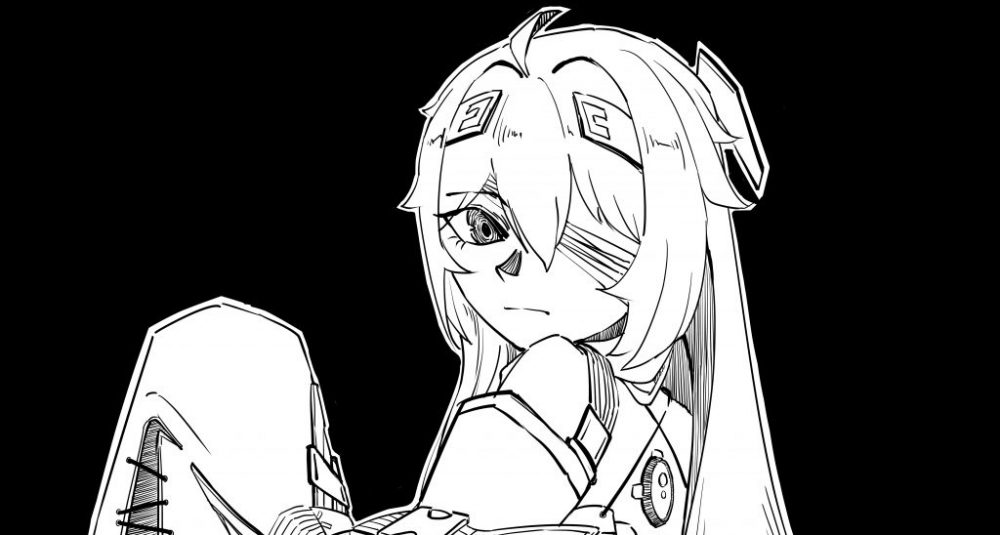
I have mentioned in the settings of this character ETA, I have this original character for a very long time from the beginning of the first year of BA Animation Course in this University. And during the two years, my original story world was filling up little by little, and many different characters and stories were created or I could say born in this world, how ever as the main character ETA had no specific image of how she look like and only had the text of the settings. And at the beginning of this year I tried to decide the image settings of ETA (see the above image). However due to my paint skills are not very well at that time and I was still not sure about how the prosthesis she used should look like, I was not satisfied with this design. And by the way, in this design, ETA was not full body-replacement cyborg, only her left eye and her legs are prostheses. So when I started thinking to chose the prosthesis as one of the theme of my Final Major Project, I thought I could finish this character, update the setting and turn her into 3D version.
Connecting Structure
When I designed the connecting structure of the prostheses and the body, I referred to the ways of Russian spacecraft connecting structure called the SSVP system. The video I watched about explaining this system is on Chinese video website, so I am going to do a brief introduction of this connecting system. So there is a small searching unit on the docking port, and this searching unit will do the soft capture with the other docking port, and when the soft capture is done, the docking ports will get close to each other and do the hard capture and connect electrical appliances and transfer data.
This video is available at https://www.bilibili.com/video/BV1u44y1Q7H9/?spm_id_from=333.880.my_history.page.click&vd_source=ada389038b8a9affad47a574ffda908b
Here shows the way of how the prostheses connect to the body of my character. It looks very like the SSVP system I introduced in the above paragraph. So there is a spherical interface in the front of the connecting port on the prostheses, this interface will do the soft capture first with the other connecting port on the body. And then a ring structure which was hidden inside the connecting port will protrude and do the hard capture with the connecting port on the body, and connect the system and transfer the data. And on the one side of this structure, there is a slot which allow the character ETA to install different extra equipments or weapons according to the situation. There will be a orange light on the side of the connecting ports, to show that the prostheses and the body are successfully connected. And the red button next to these lights are designed for the character or the mechanical arms to press down and start connecting.
Character Design
When I finished the front of my character and the color matching, I turn to finished the completed design of the character. So the for the body the breasts and the buns were designed ass the only parts which were kind of soft compare with the other parts of the body and I used light color white to cover them. And for the other parts of the main body is based on the mechanical structures and covered with a kind of adaptive material, so these parts can be soft or hard at one moment. I used black to around the grey to accentuate her woman’s figure. And there are a lot of orange indicator light on her body to show the state of this cyborg body. There also a lot of slots I designed on the main body for the later armor design. And for these arms and legs as they can be seen as a set of prosthesis, so I designed them different with the main body. As this prosthesis referred to puppet, and should be a cheap and normal prosthesis for living, I kept it in a very simple design. And after the design of the turn around of the whole character I paint a illustration for my character ETA, due to I have not finished my weapon design at this stage, so I did not paint the weapon in her hand. And I also paint three different expressions to show the emotions she might come up, like angry, happy and hate.
Battle Mode Design
As I mentioned in the PDF, Luca gave me the suggestion of designing a battle mode for fitting the four types of prothesis. Luca suggested me to refer some automatic armor like iron man or some things like Nami technology. However when I started designing I thought the technology in my world have not developed in to the Nami-tech level, it may arrive in the future, but not at this moment, so for my character still need to install her armors by herself or by the mechanical arms.
At the beginning of the design of the battle mode of ETA, I draw four rough design of this battle mode and I ask Michael for feedback. And for Michael, he thought the first three designs are very good and he prefer the first and the third one. Cause they both cover the most of body and with the armor. As I have mentioned in the PDF, that I thought the third design is not technical so chose the first one. And Michael mentioned that there was no protection on the crotch, so I added a piece of armor on the crotch.
Prosthesis Design
When I finished the design of the speed type and the strike type of the prostheses, and I also asked for feedback from Michael and Luca, and they both thought my front view and back view of these two designs were good. However the side view of the character was strange, to be specific, the legs were too straight, they should be more close to the normal leg shape, so I did some changes on the side view of these legs (see the above image).
And later I asked Luca about the weather I should change the indicator lights on armors of the battle mode to fit different prostheses, like orange for speed type, green for strike type and red for CQC type. Luca suggested that I could only change the indicator lights on the important part like mechanical spine to show the different types of prostheses the body install with. So I only changed this for my character design.
Illustration of The Different Prostheses
Although the time is not enough for me to finished illustrations for my character in different types of prostheses, I used my figure to made so pose reference for these illustrations. So you can see there is a skating pose with a submachine gun for speed type, a pose in tactical operation for strike type, a pose with two long sword for CQC type, and one look like diving in the ocean for marine type. Later I will finished the design of marine type first and then turn to paint those illustrations.
Weapon Design
For the weapon design, I do not have more process about the design, however I need to mention about the name of these weapons in the PDF. All of my weapons designed for my character has a CW prefix, CW here means Clone weapon, cause all these weapons are redesigned by my character ETA and they are based on some kind of weapons in the reality. After the CW, it will followed by the abbreviation of the weapon type such as P present pistol, R present rifle and TK present tactical knife. And behind the type of the weapon, is the number of the generations of design. Of course in the story, there will be a lot of test version before or after these designs.
These are all the extra information I can remember to add right now. And if I have more to add I will add them later. And thanks for reading my project.